

Onboarding – Profile Setup
After successful registration, the app guides you through an initial setup wizard. This step is essential — it ensures the right features and data are displayed for your specific home and units.
Continues from: First Steps & Account Setup — if you haven't registered yet, start there.
1. Your Role and Property Type
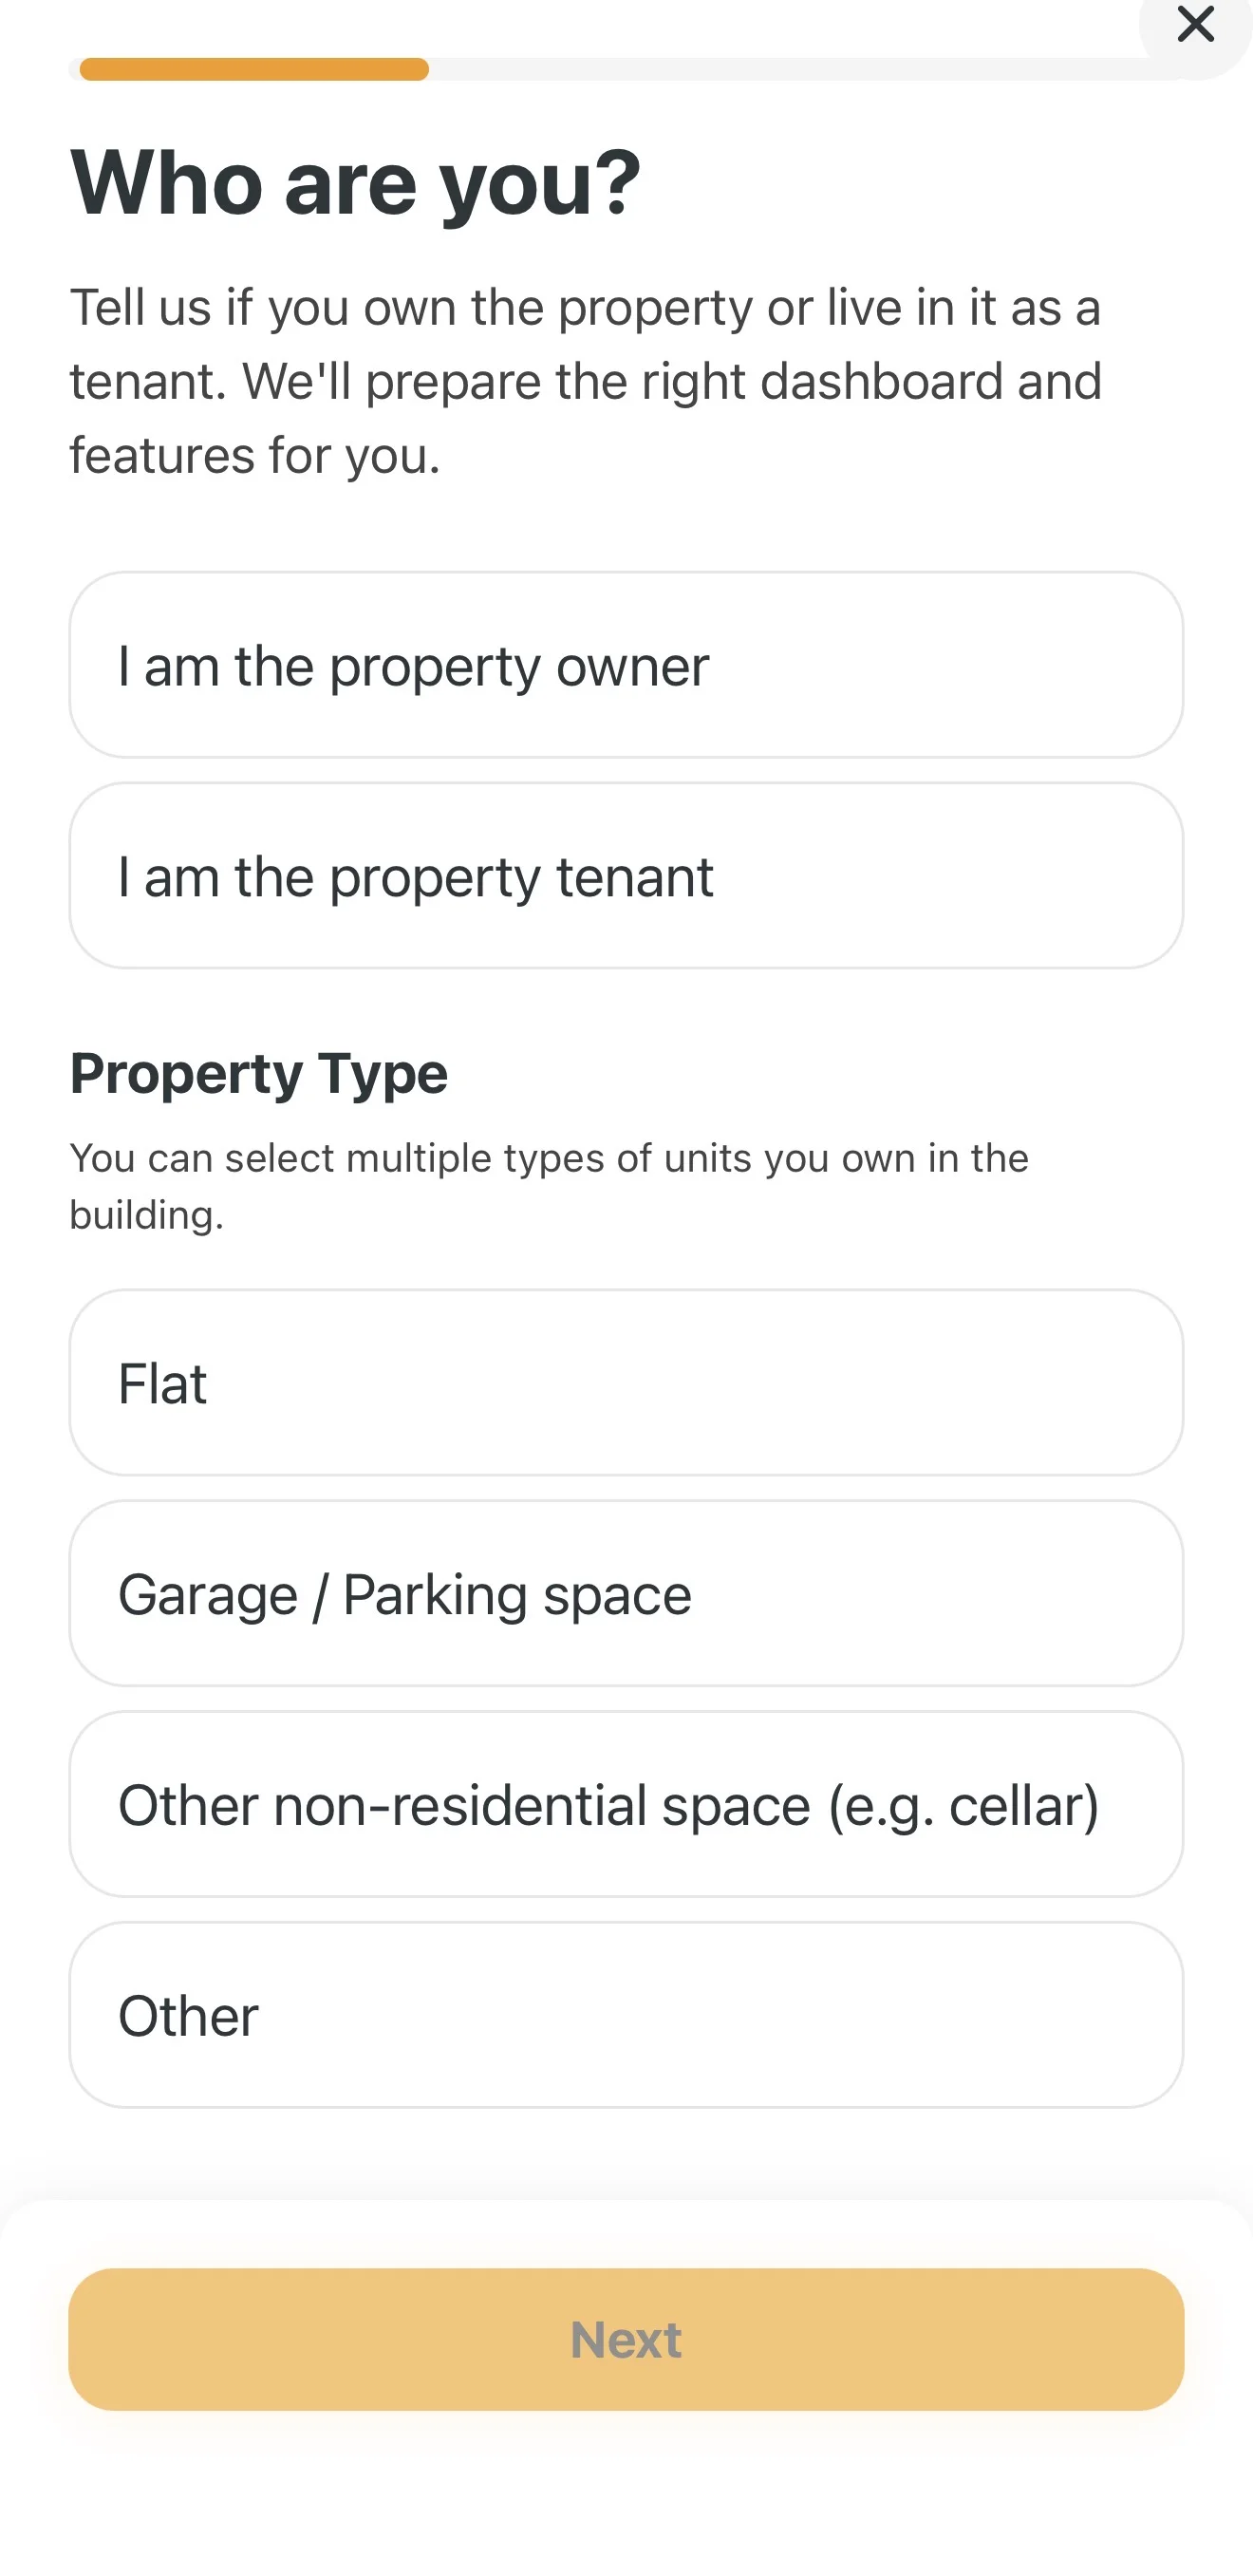
The first step of the wizard is on the Who are you? screen — define your relationship to the property and select all units you occupy in the building:
- Select whether you are a Property Owner or Tenant.
- In the Property type section choose the types of units. You can select multiple options at once — for example Apartment and also Garage / Parking space (or Other non-residential space (e.g. storage room) or Other).
- Tap Next.
2. Basic Details About Your Home
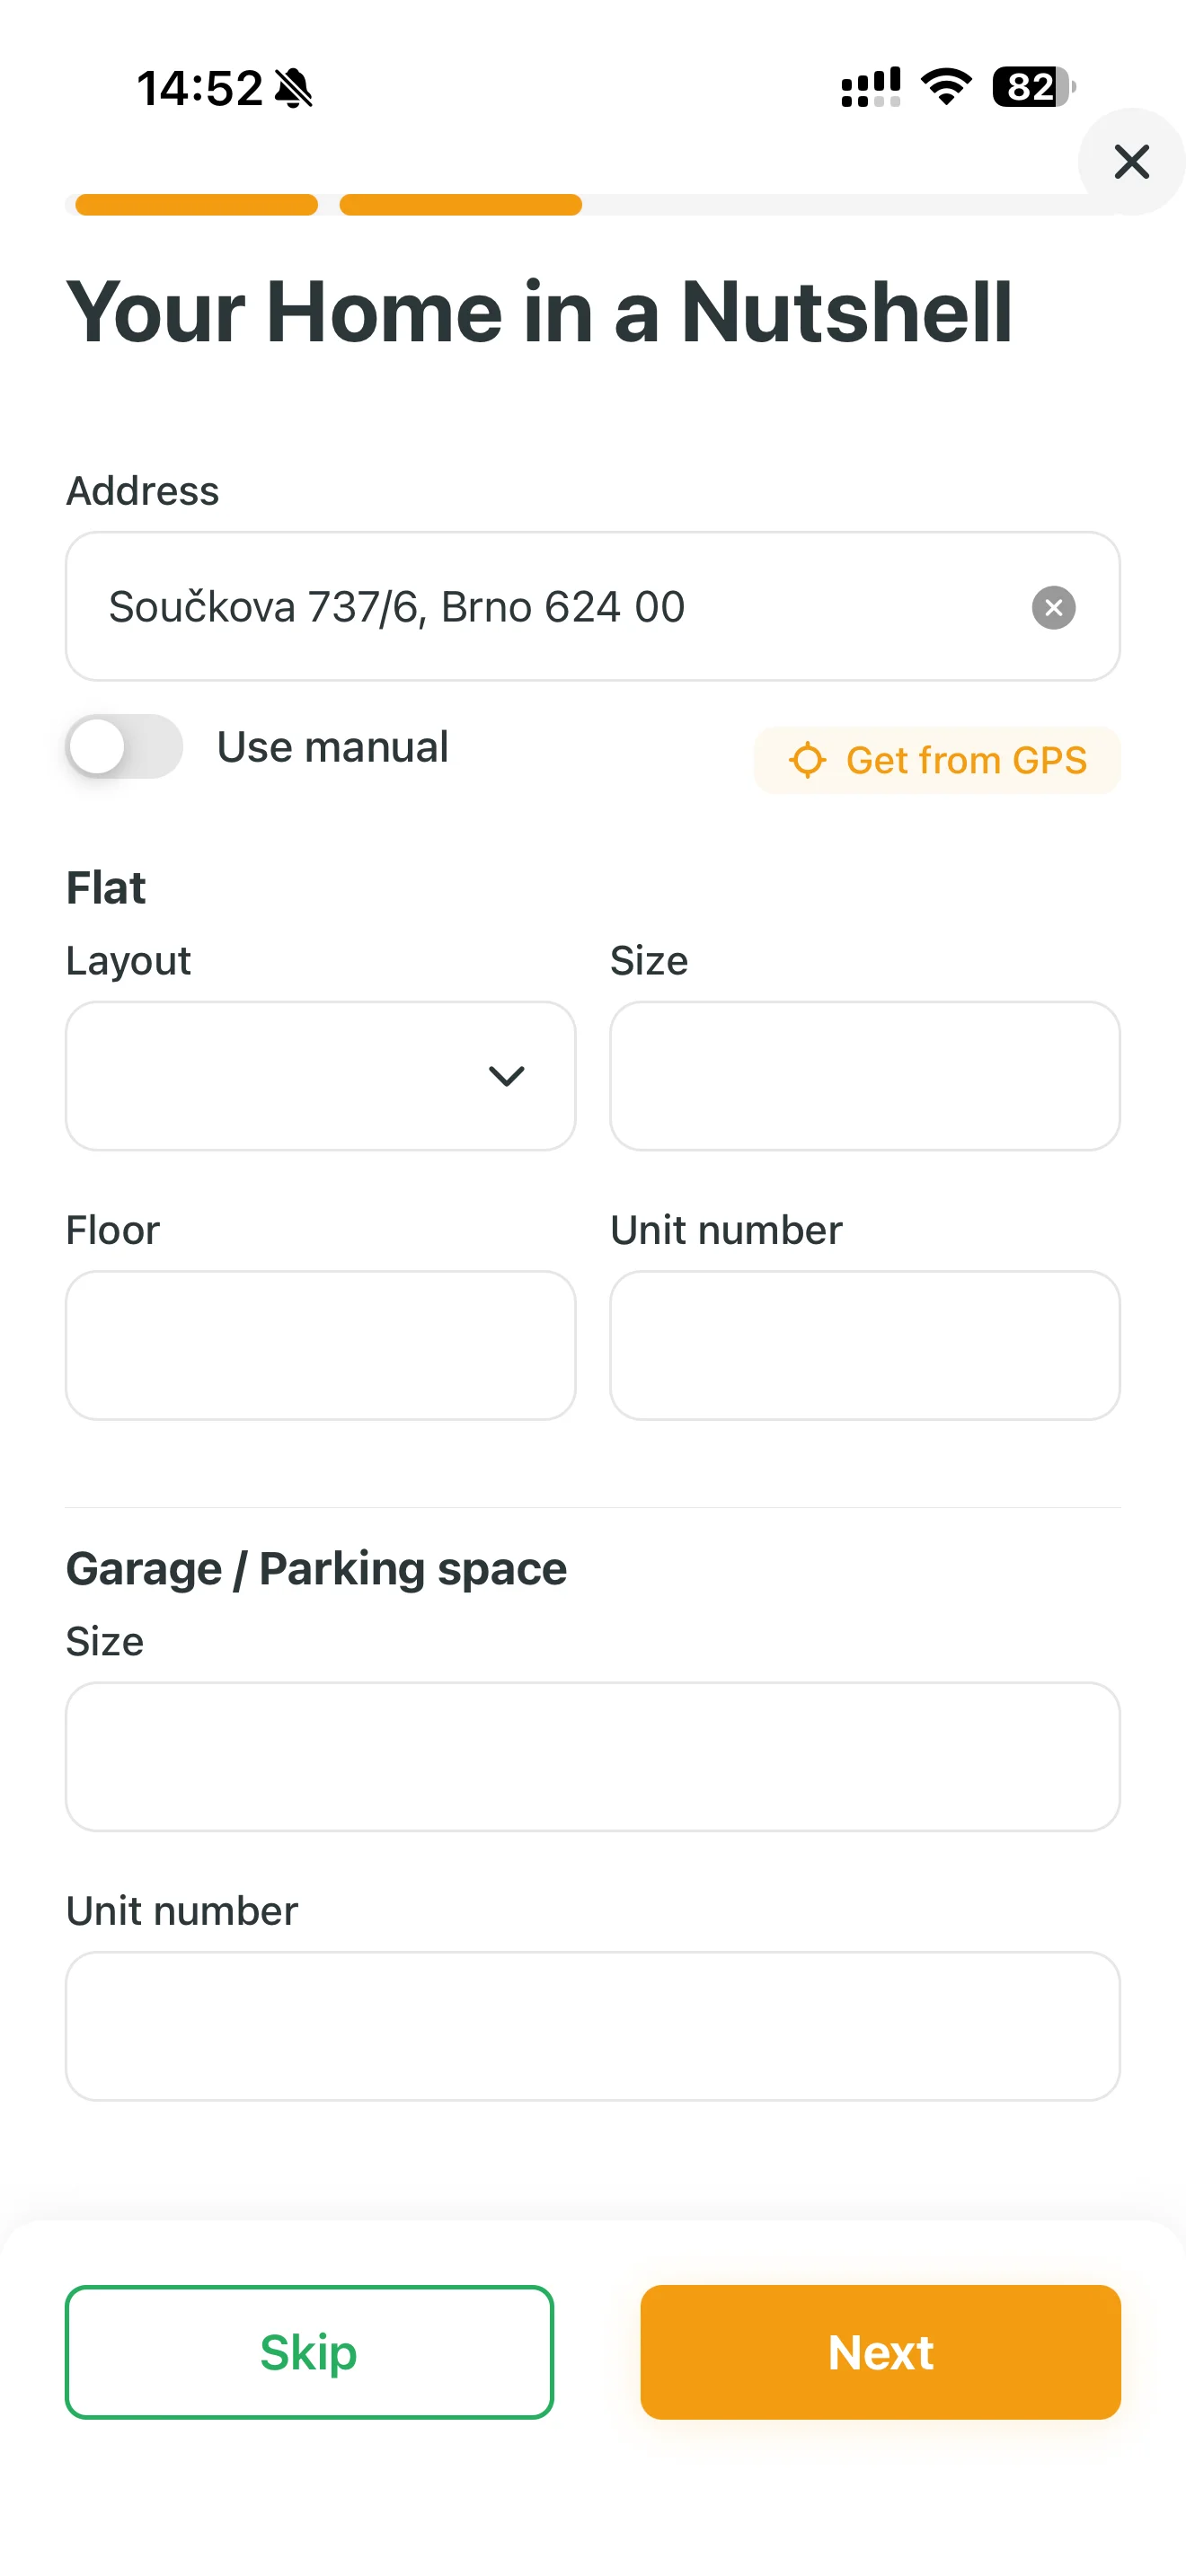
In the Your home at a glance section, fill in the address and details of your selected units:
- Address: Start typing in the "Address" field or use the Load from GPS button. If the autocomplete can't find the address, enable the Enter manually toggle.
- Apartment details: If you selected an apartment, fill in its Layout (e.g. 3-bedroom), Floor area in m², Floor and Unit number.
- Garage / Parking space details: If you also selected a garage, fill in its Floor area and Unit number directly below the apartment section.
Tip: You can update these details at any time. If you're in a hurry, skip this step with the green Skip button.
3. HOA Management (For Board Members and Chairpersons)
If you lead your housing association, Domee.app will significantly simplify your administration.
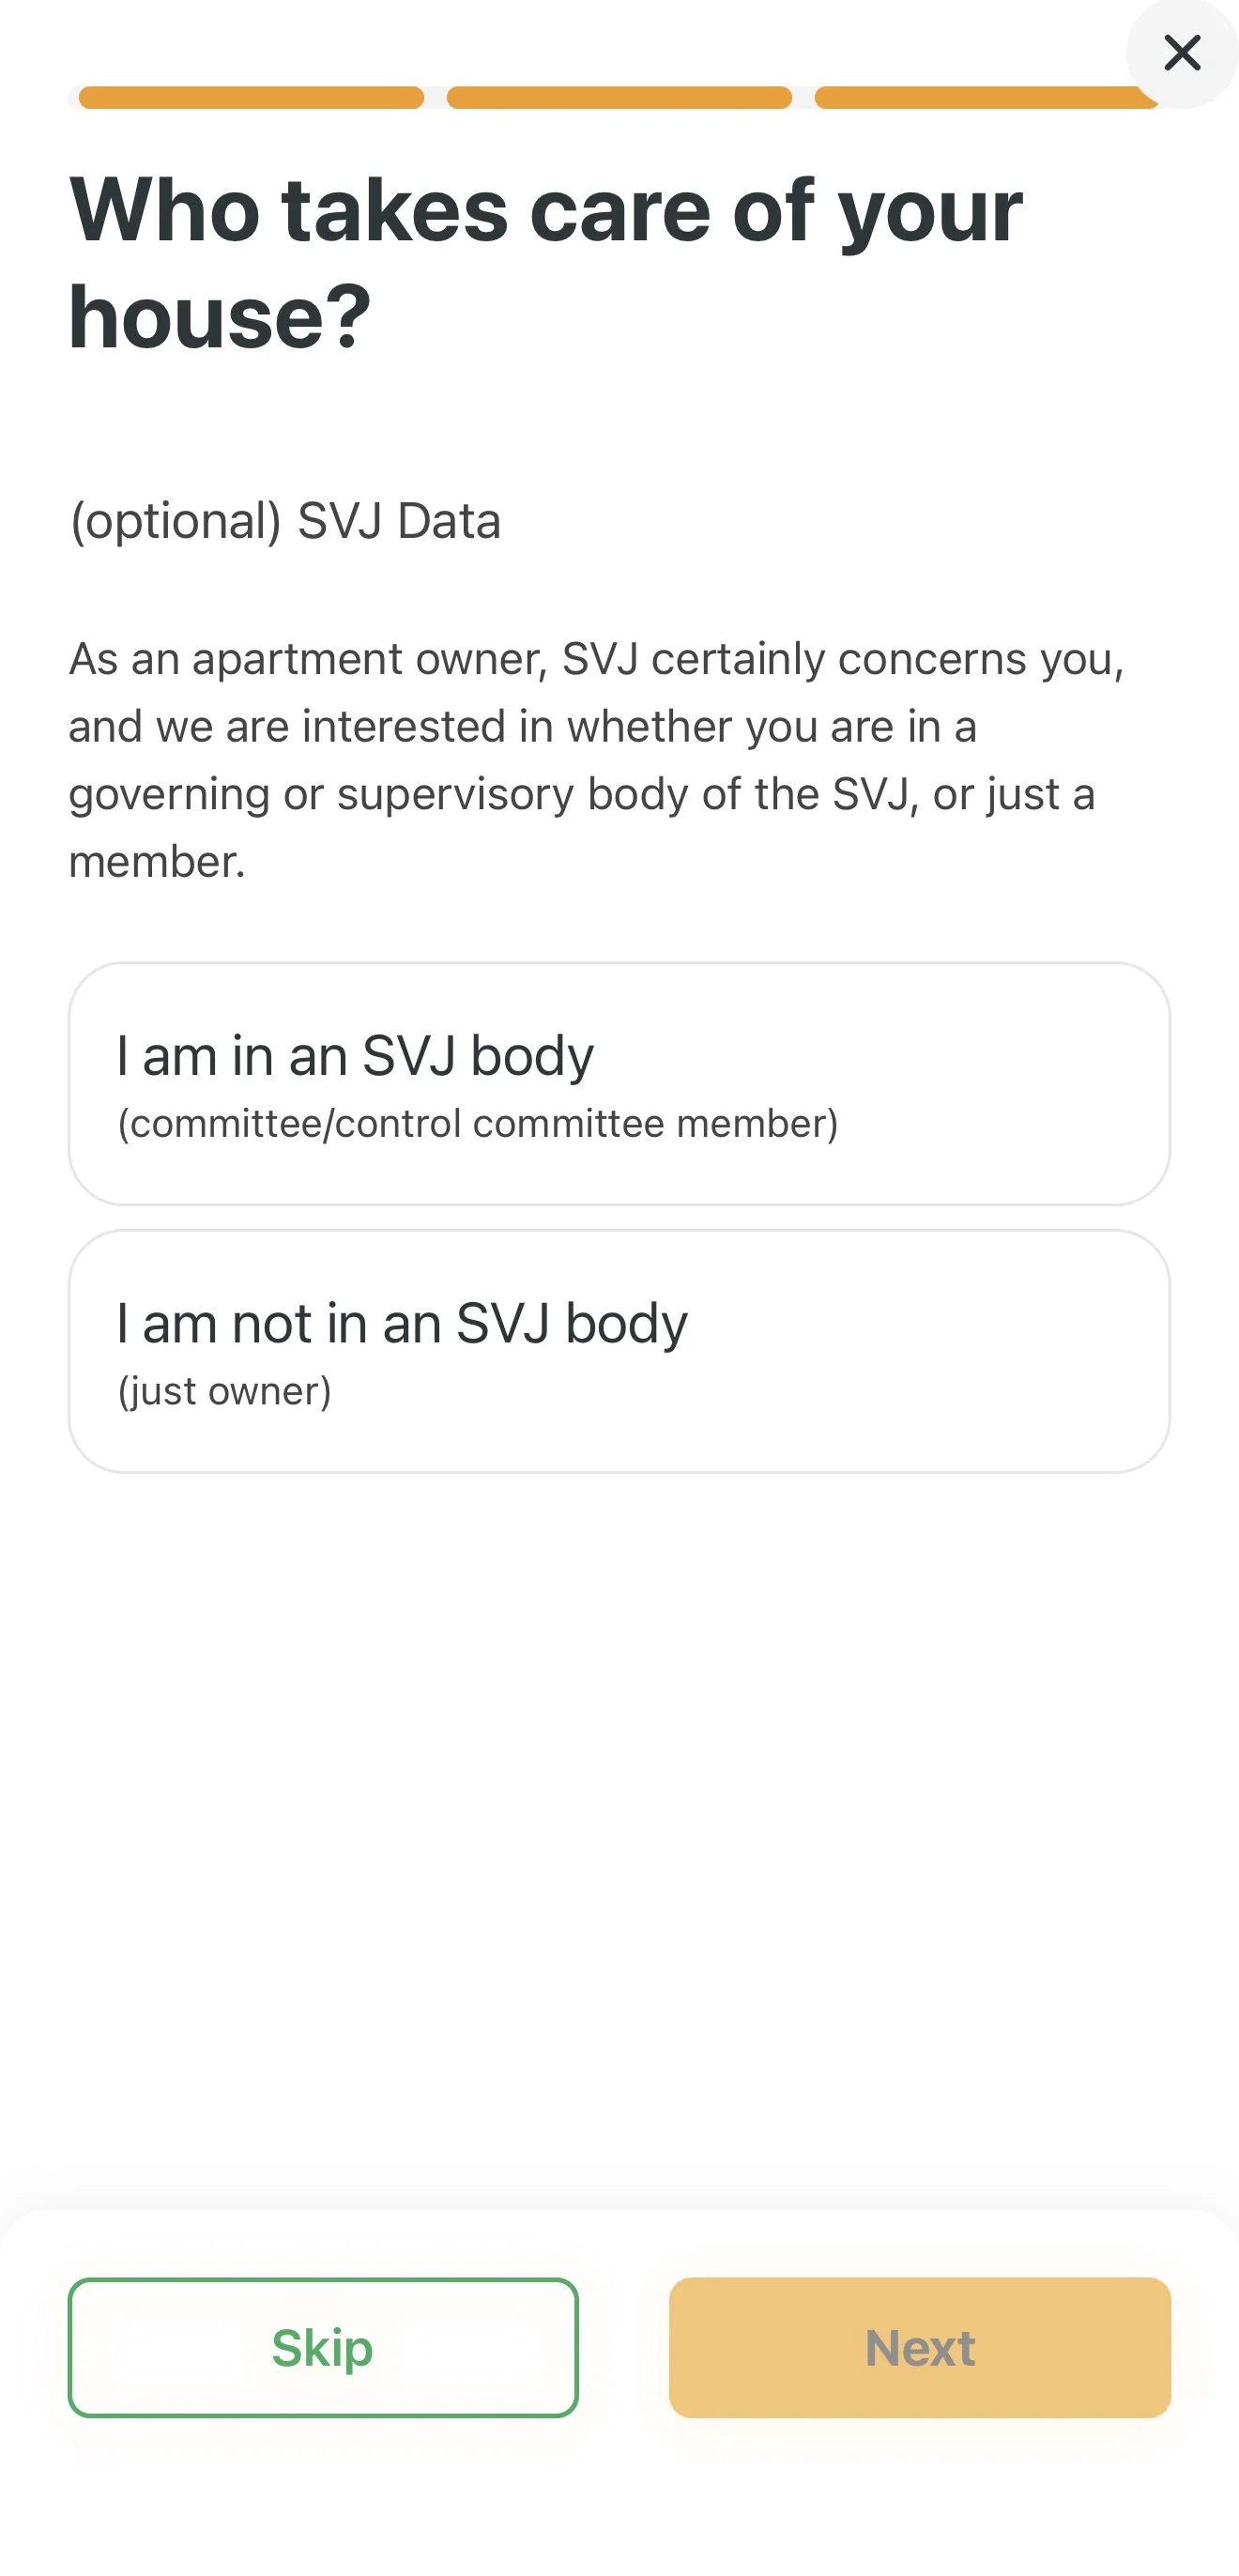
- When asked "Who takes care of your building?", select I am on the HOA board.
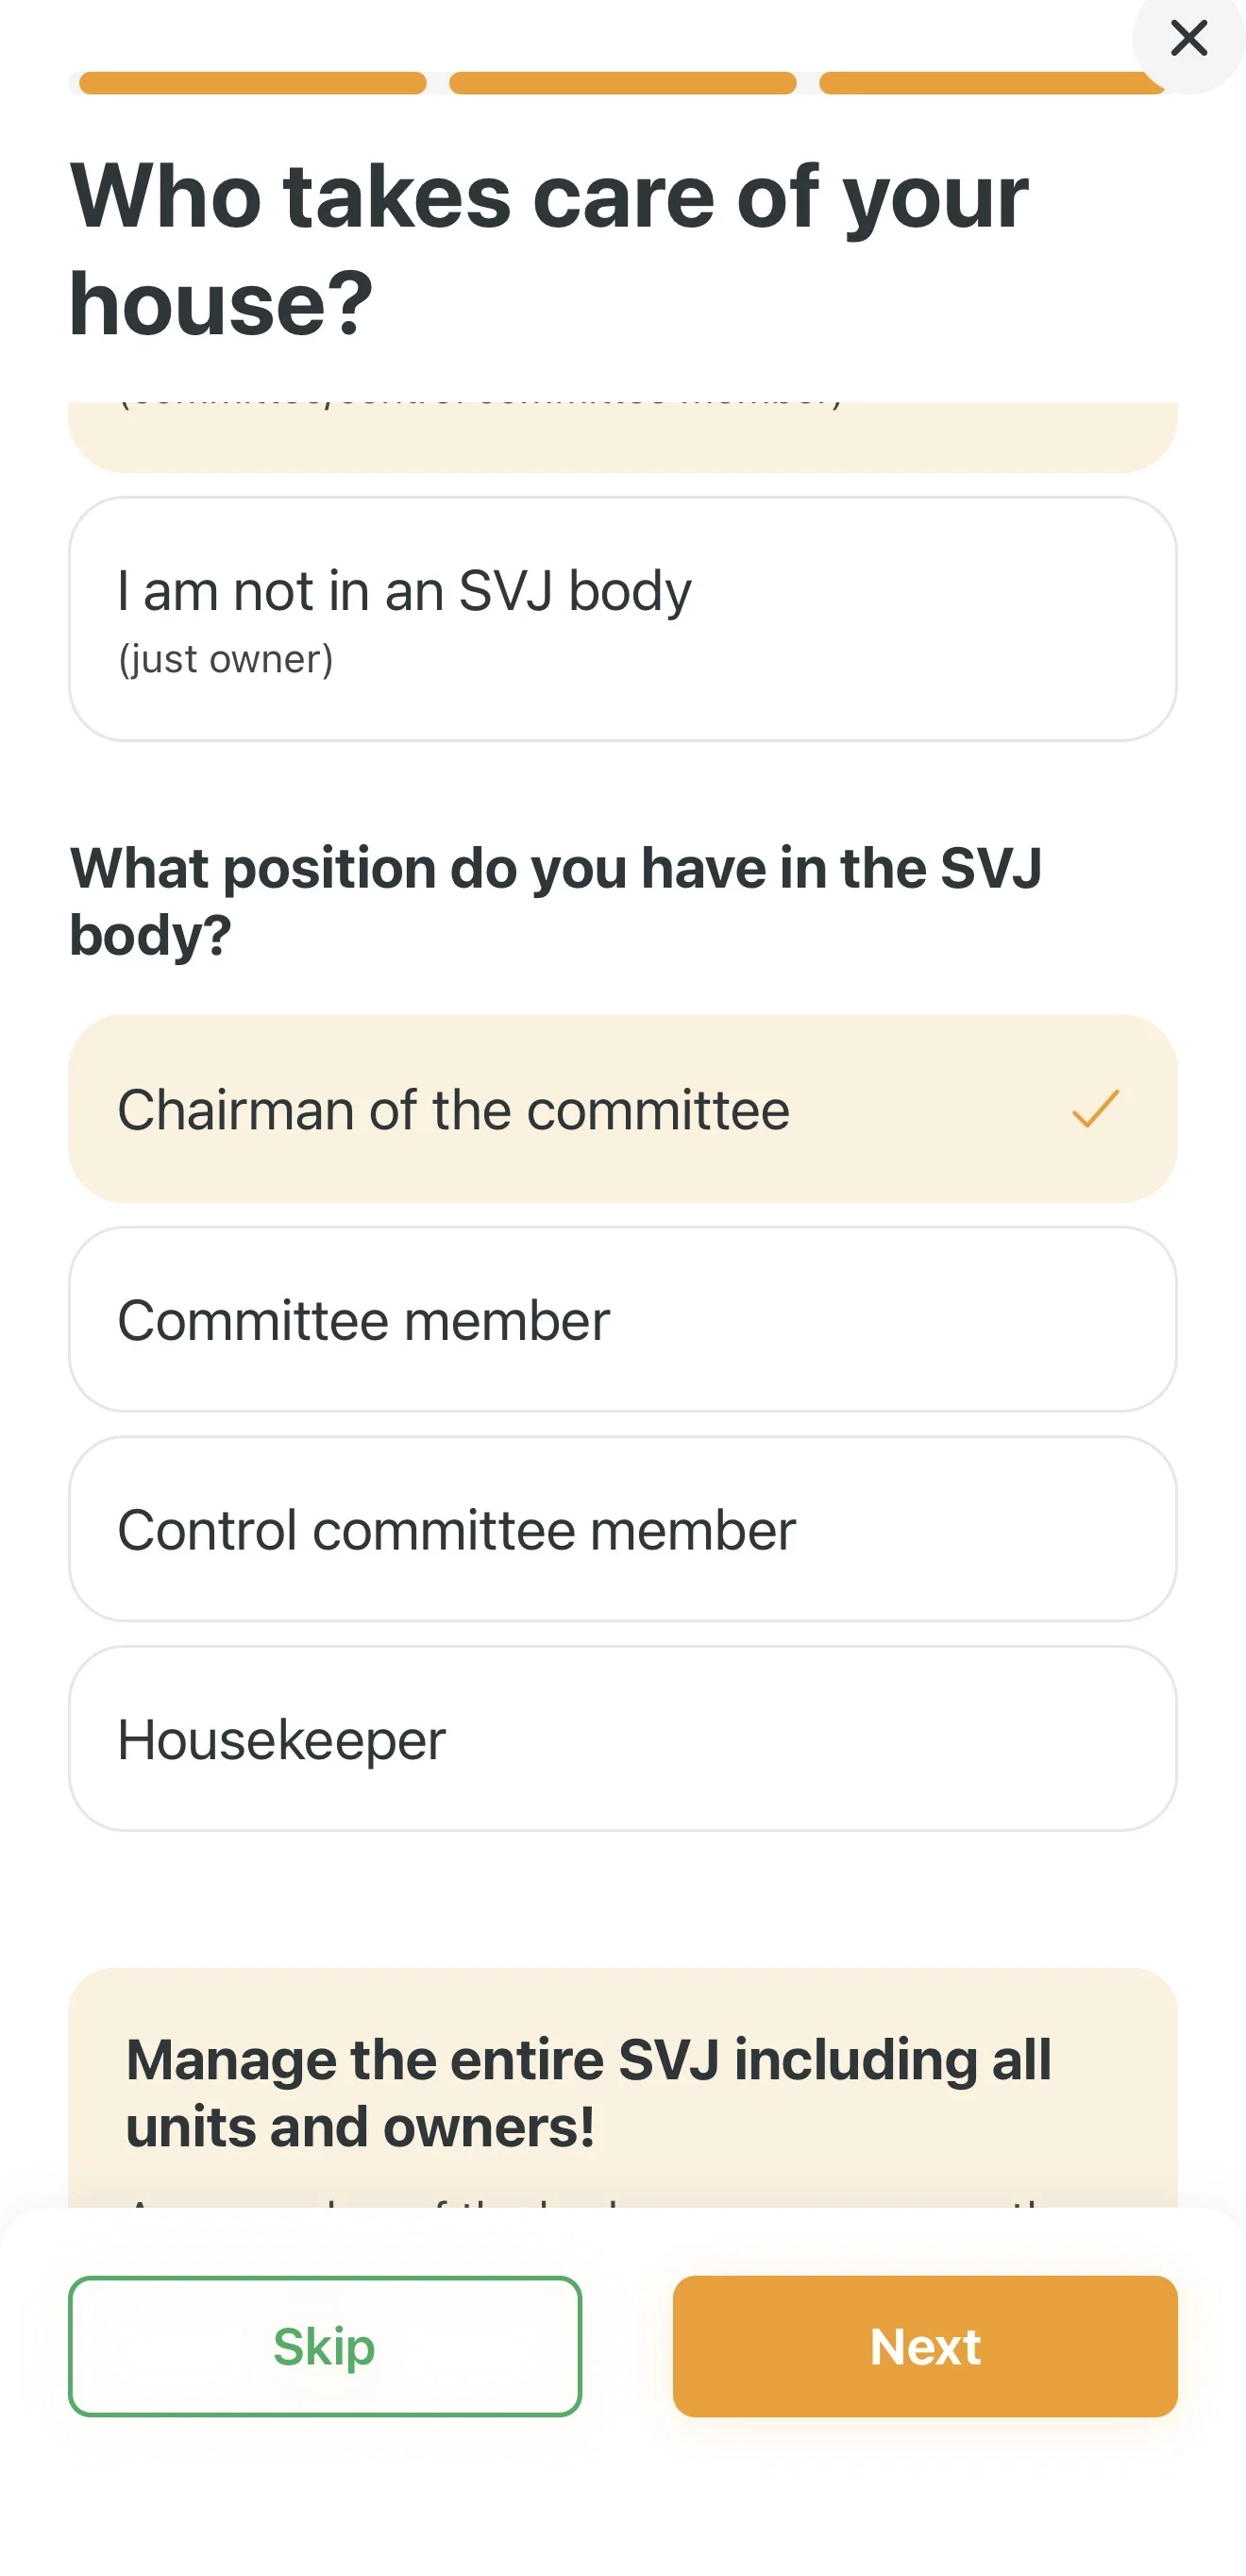
- Specify your role (e.g. Chairperson, Board Member or Building Manager).
- Tap Next.
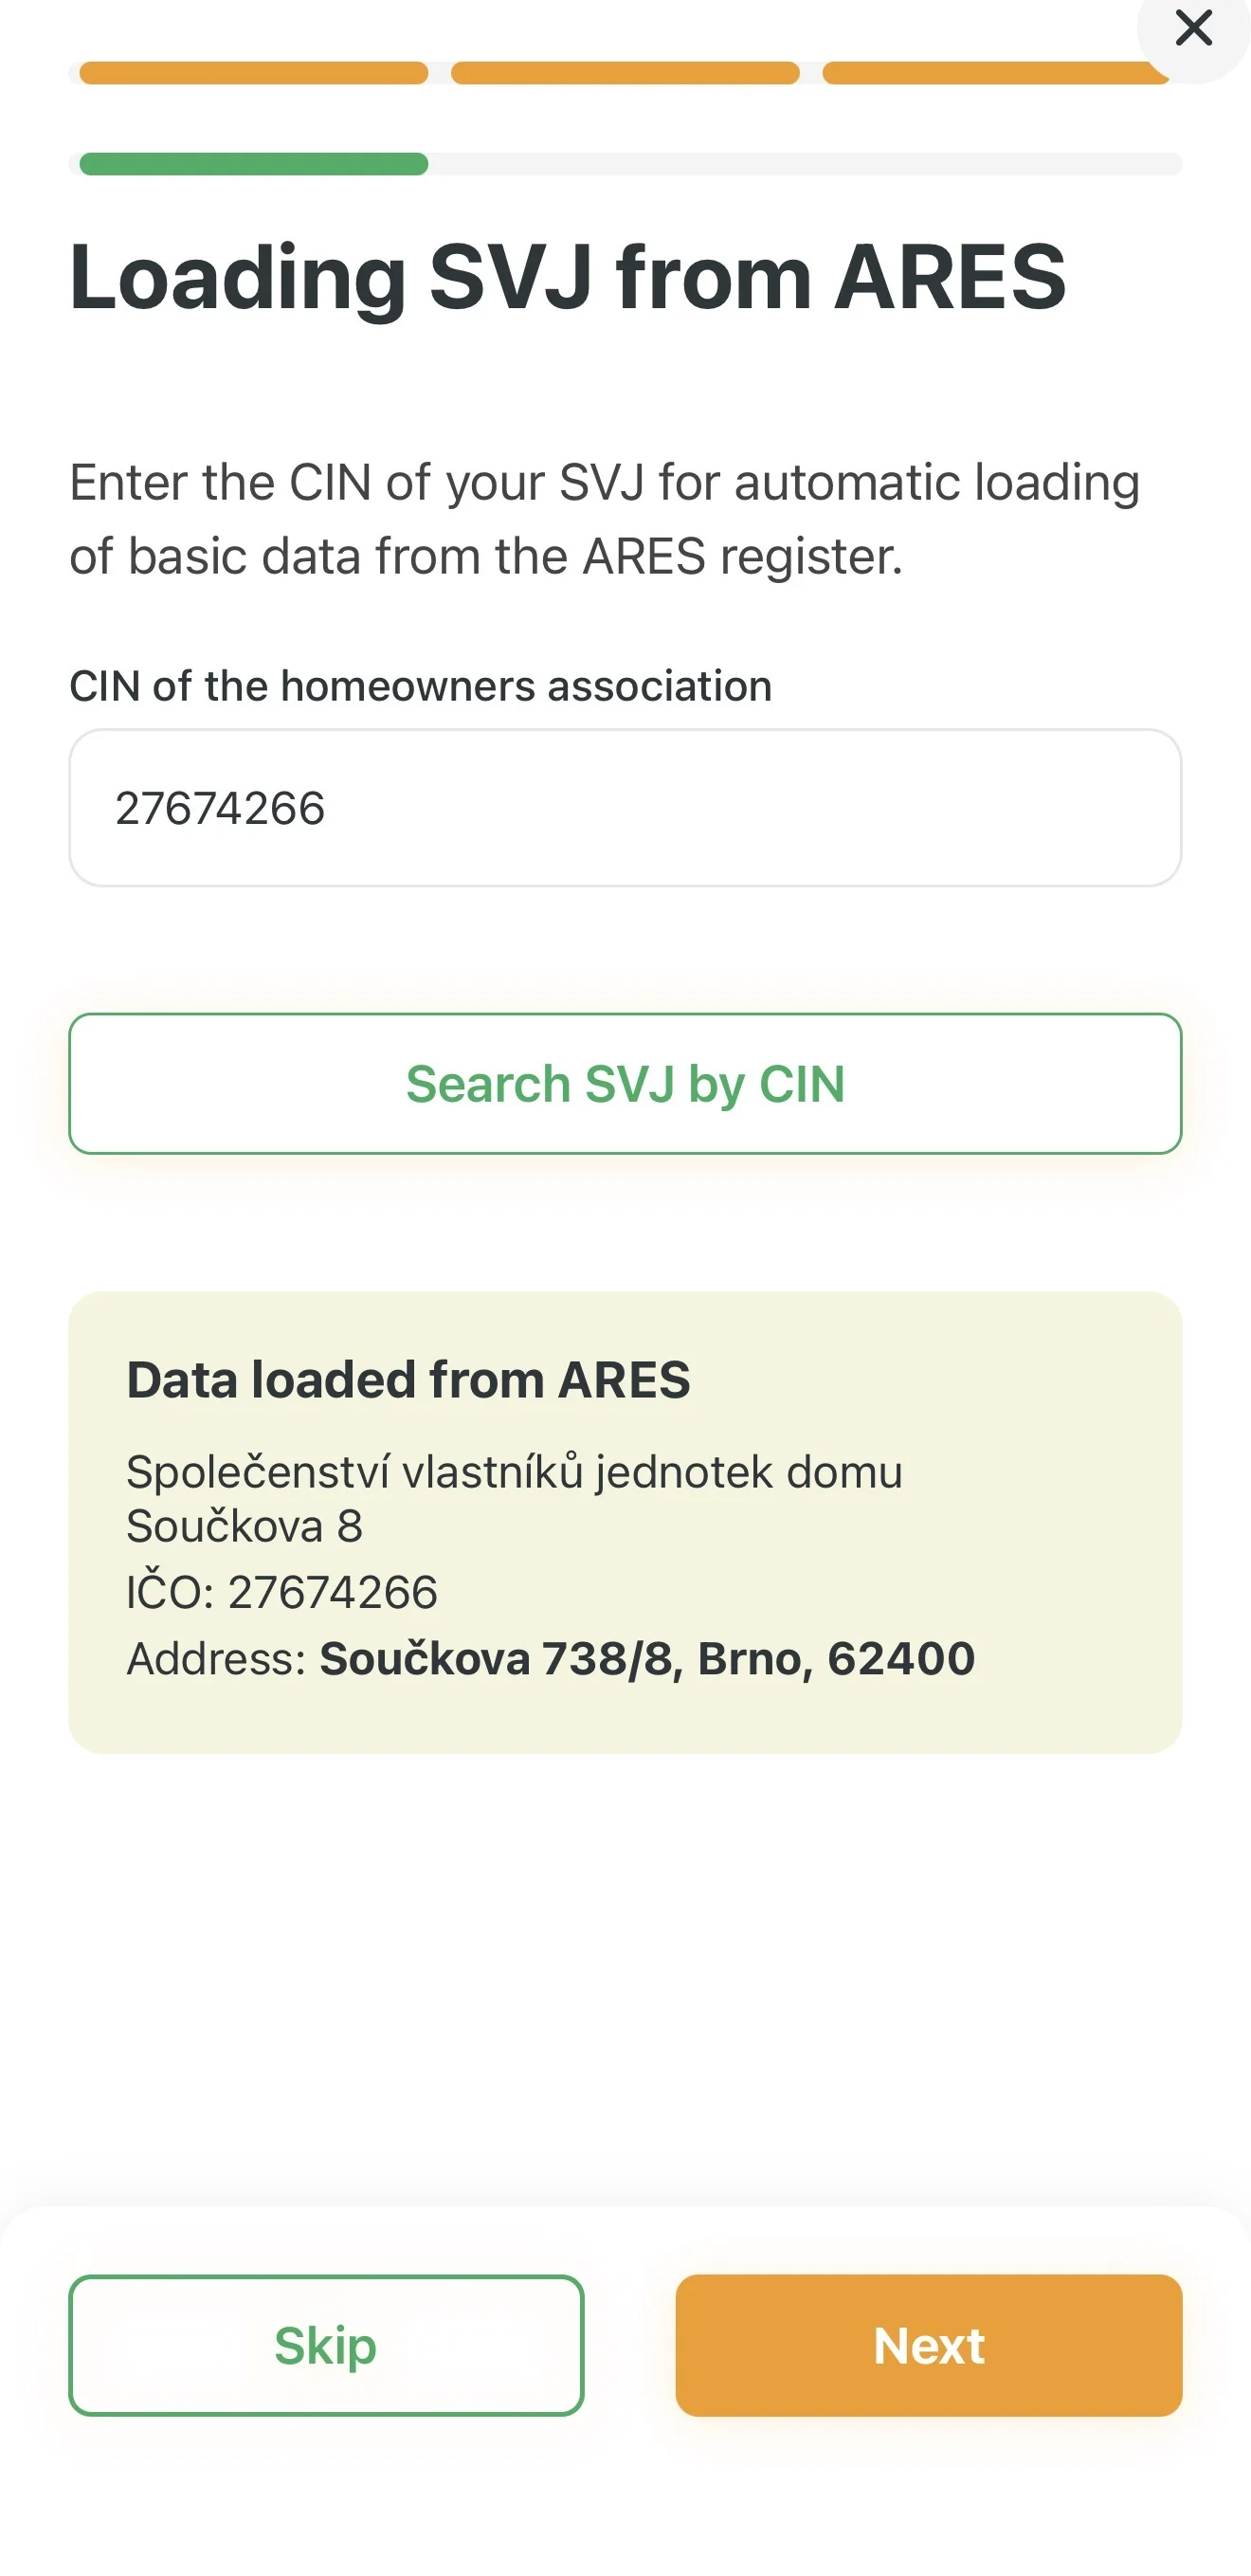
Automatic Lookup via ARES Registry
You don't need to type in HOA details manually:
- Enter the Company ID (IČO) of your association.
- Tap Find HOA by ID. The app automatically retrieves the official name and registered address from the ARES registry.
Managed Addresses
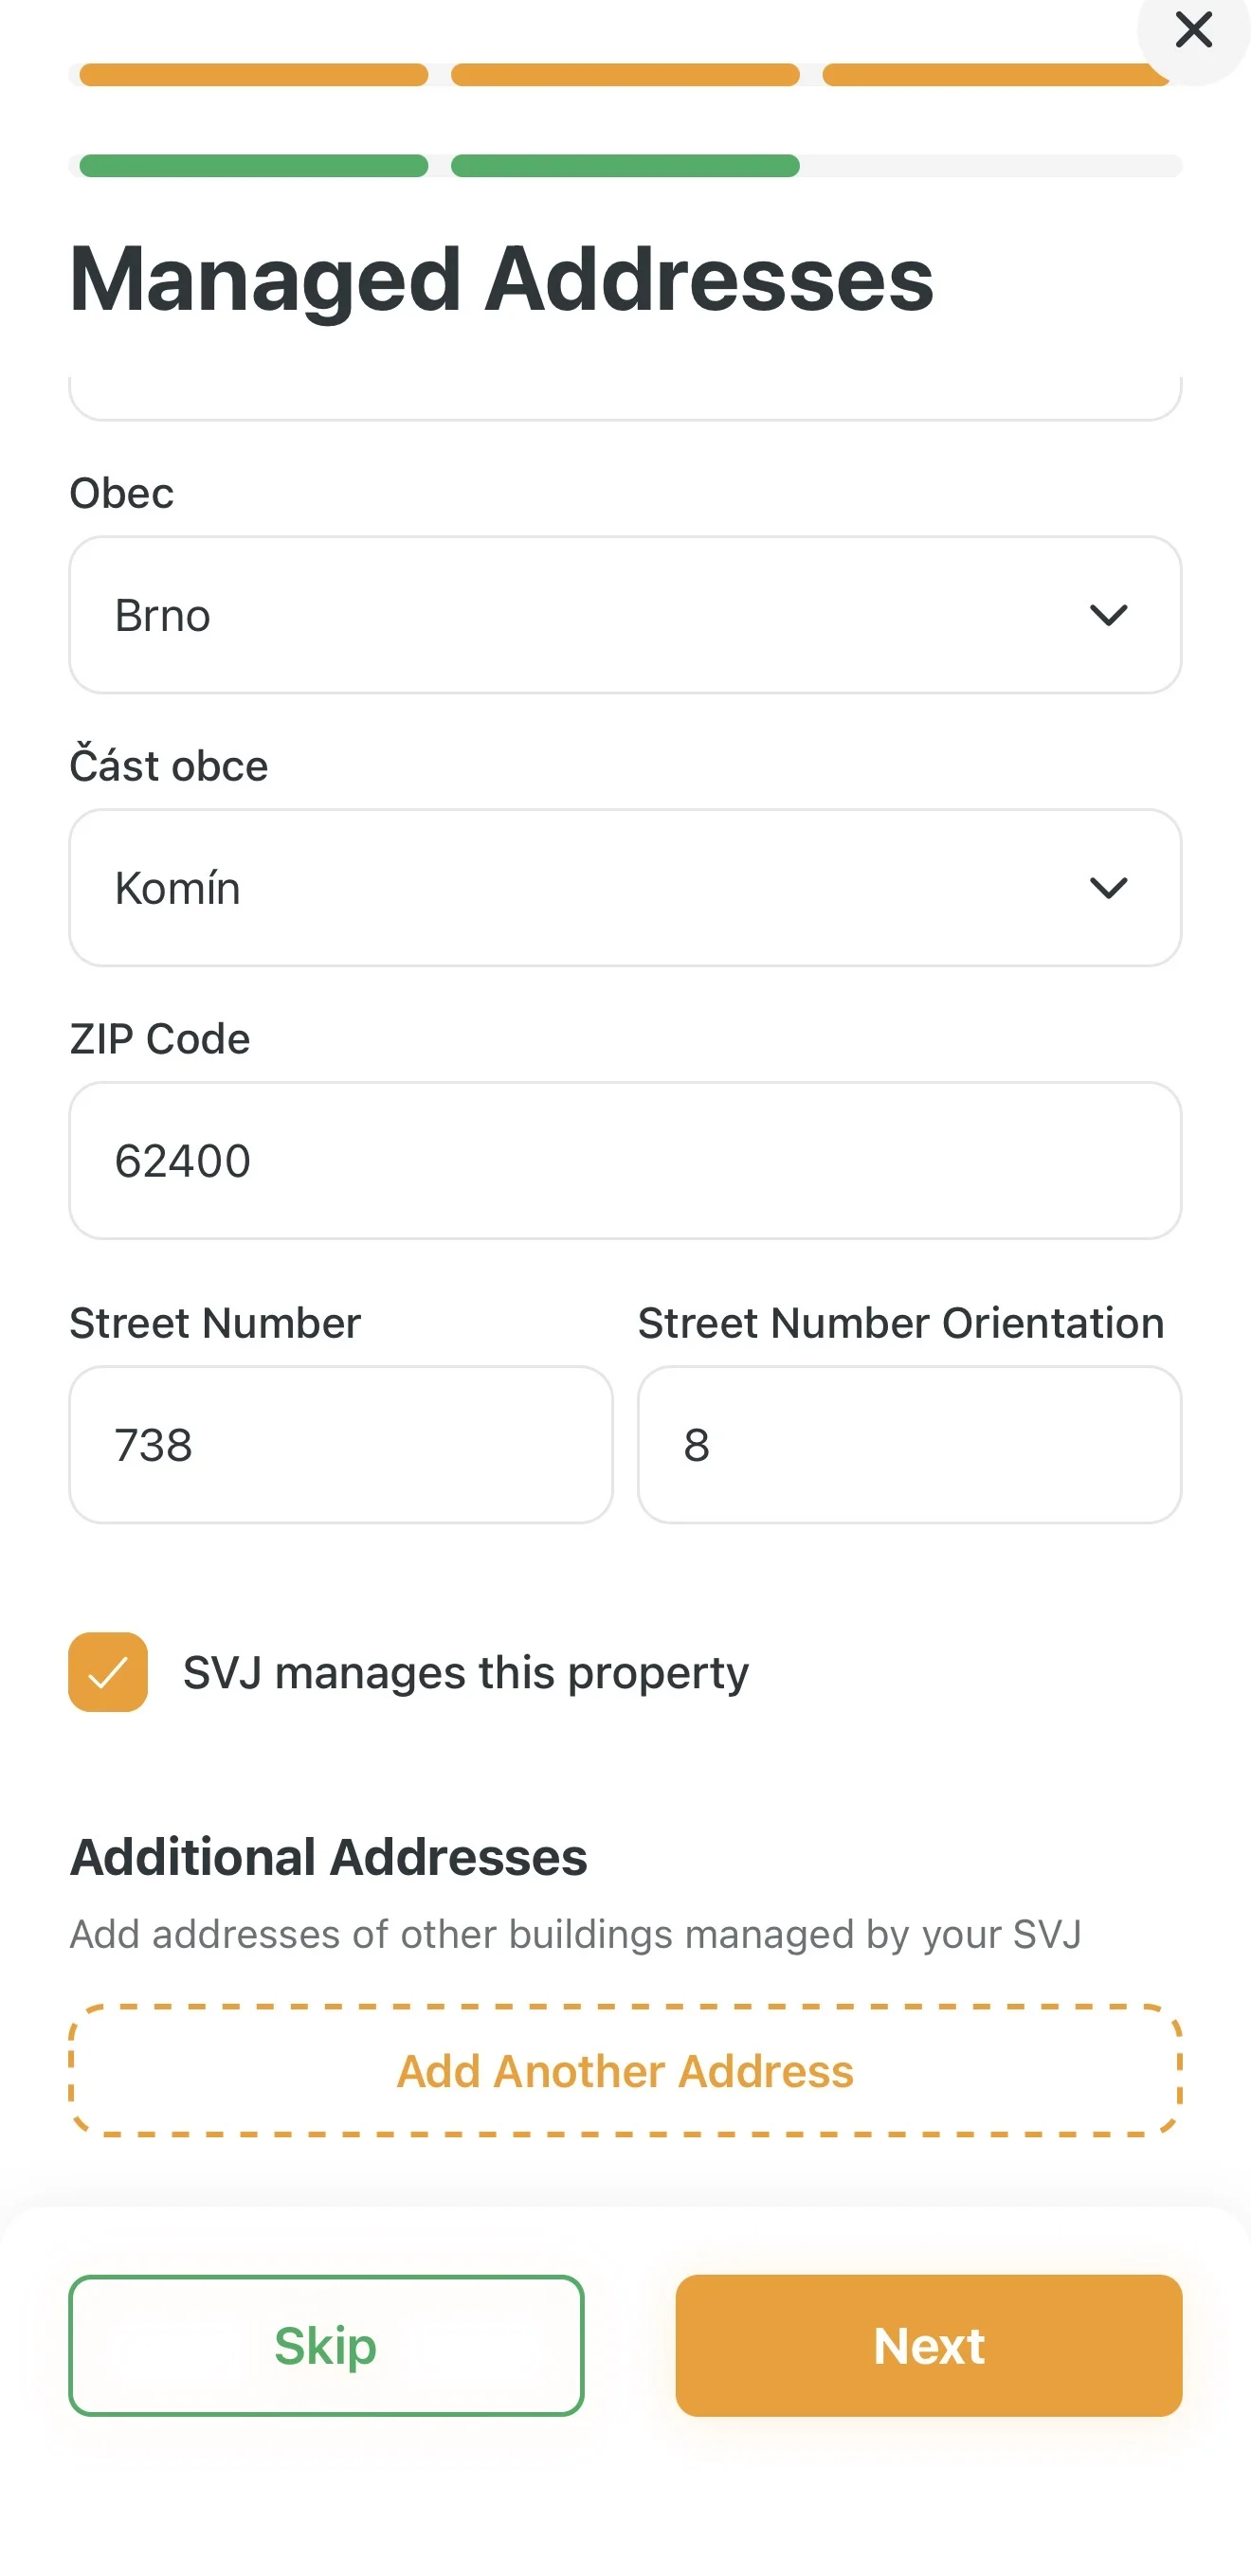
If your HOA manages multiple entrances or buildings at different addresses:
- Verify the loaded address.
- If additional buildings belong to your HOA, tap Add another address and search for it.
4. Connecting to the Real Estate Registry
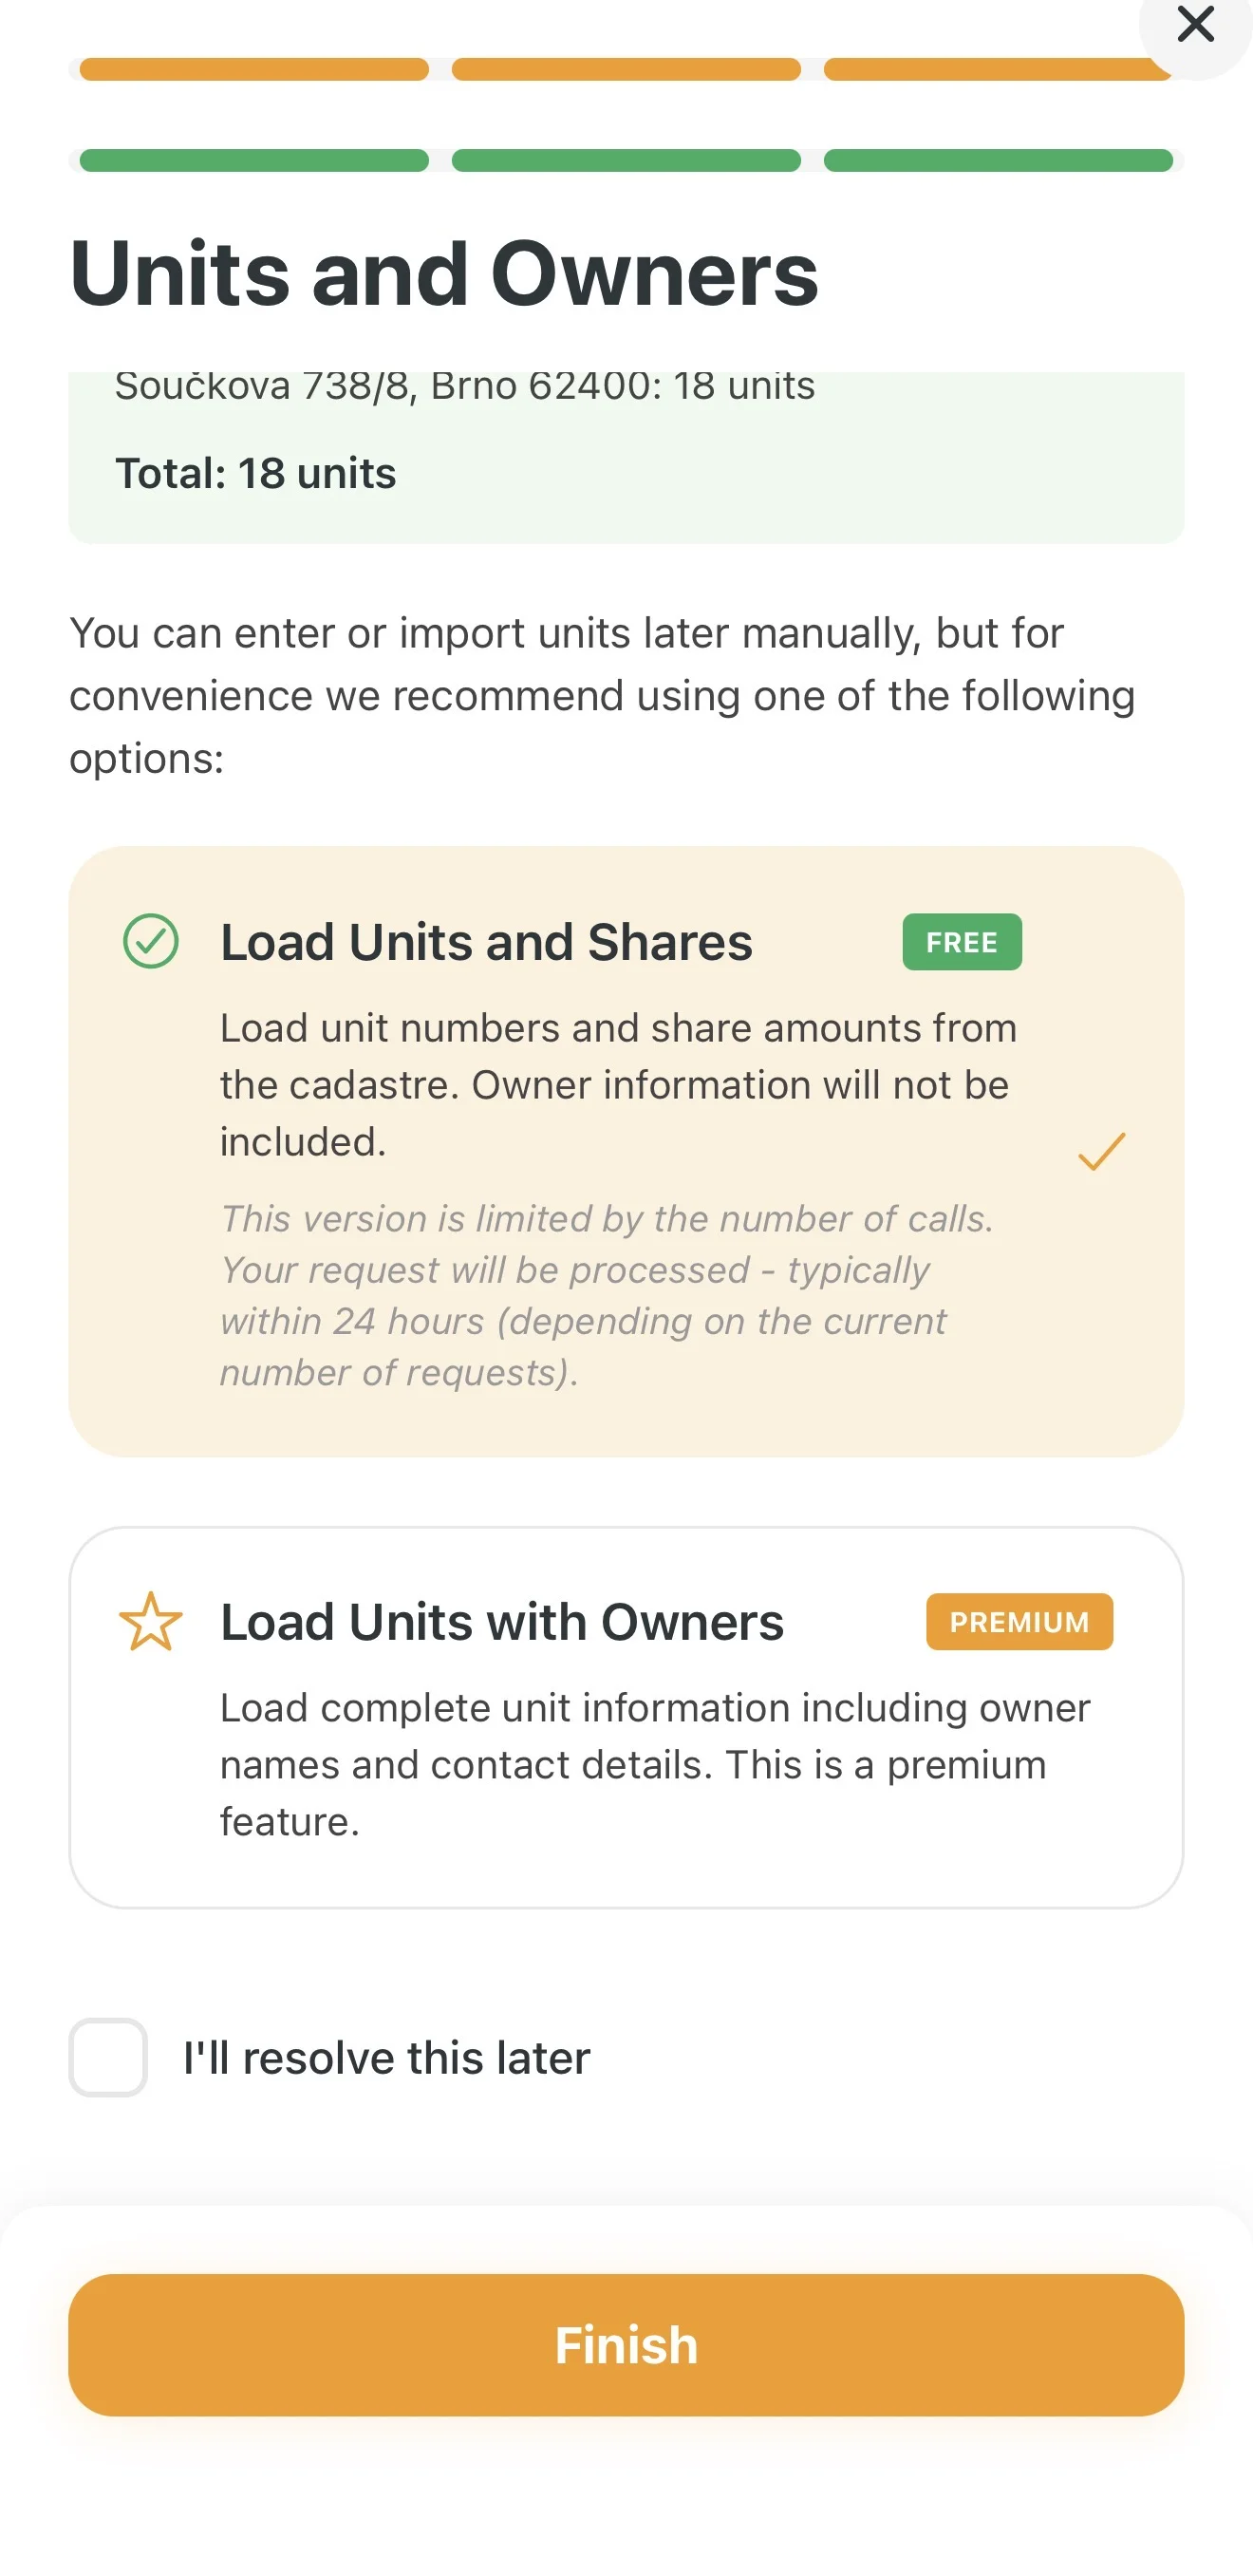
You can now import a list of all units and ownership shares in the building. You have two options:
| Option | Description | Price |
|---|---|---|
| Units and shares | Imports a list of apartments and their sizes. | FREE |
| Units including owners | Full import including names and addresses of owners directly from the registry. | PAID |
Important: The paid option saves a lot of manual data entry and eliminates errors. With the free version, you will need to assign owner names to each apartment manually.
5. Completing Setup and Verifying Your Account
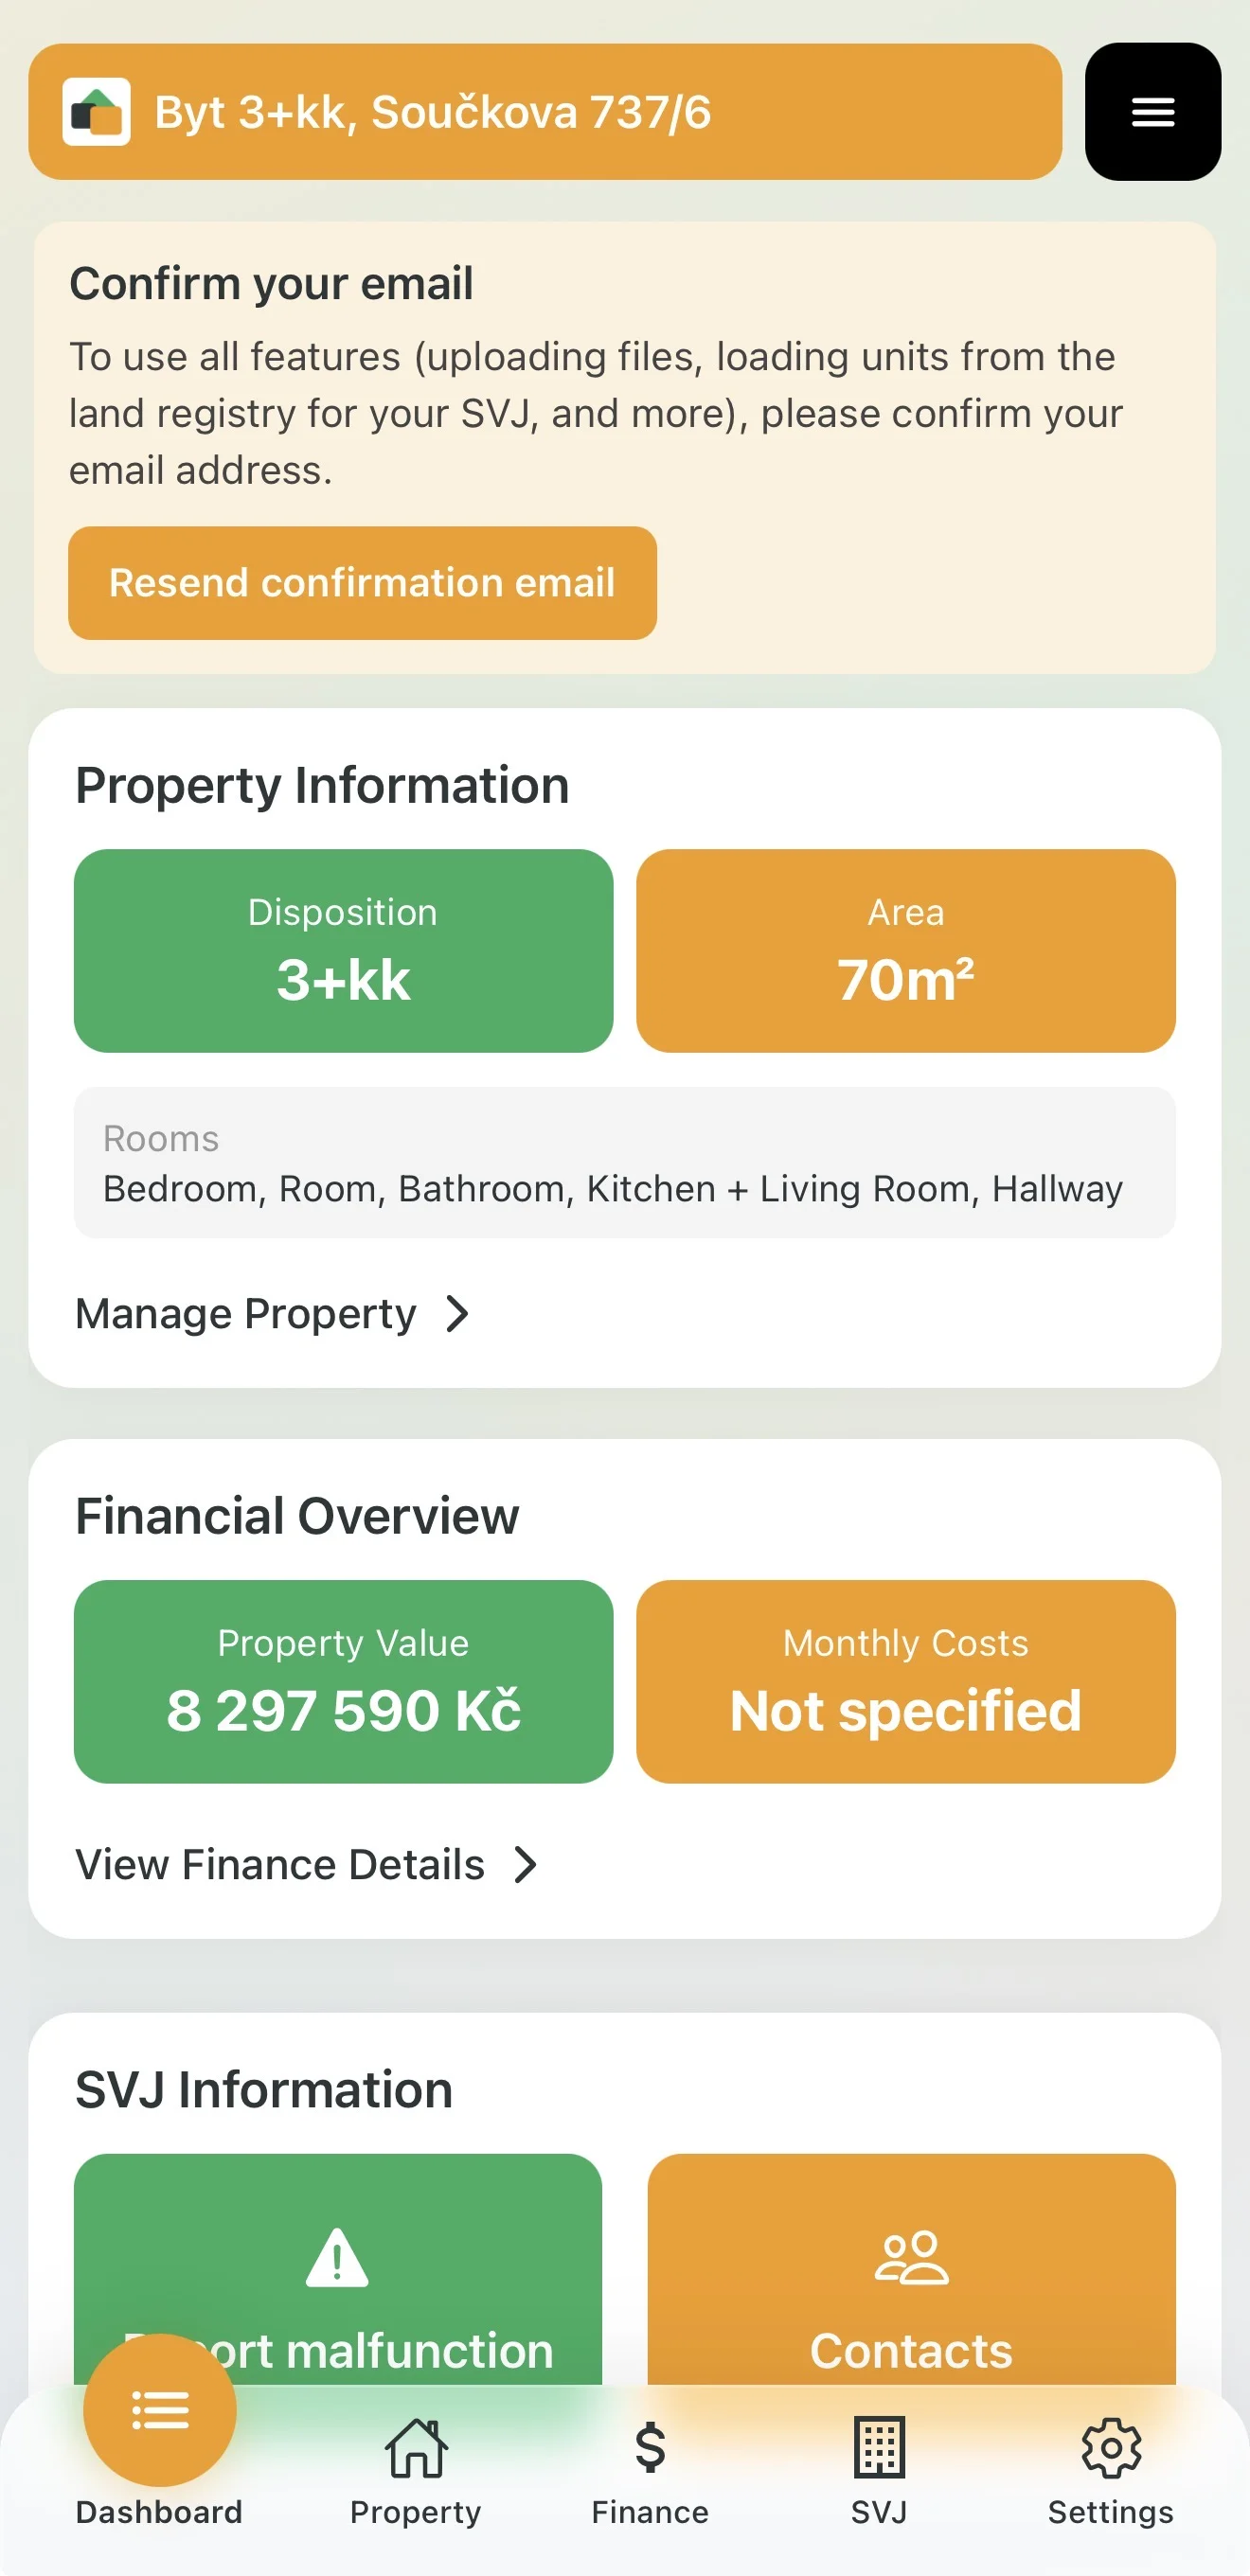
After finishing the wizard, your personal dashboard with information about your property will appear.
Don't Forget Your Email!
If you registered with email and haven't clicked the confirmation link in your inbox yet, you will see a notice at the top of the app.
- Without email confirmation, your account is not fully active — you won't be able to upload documents.
- Check your Inbox (or Spam folder) and click the link in the email from Domee.app.
Your profile is set up — what's next?
Head over to My Property to learn how to manage your apartment and household digitally: inspections, appliances, rooms and documents all in one place.